As I grew up in the 80’s, the humble serial port – an often neglected socket on the back of many home computers – became the portal to a much bigger world. Modems had existed for decades by that point, but it wasn’t until the mid 80’s that they became cheap enough that there was an explosion of online services to connect to. Bulletin board systems (BBSes), Compuserve, BIX (and for British readers, Micronet 800 and CIX) built online communities where interests were shared, arguments were won and lost, and new software for your computer could be downloaded. In fact, from the mid-80s I wrote & sold my own BBS software and terminal emulators first for 6502-based, then ARM-based computers.
Back before dial up internet, the online experience was almost always text-based – just like time sharing systems were in the 60’s. You would run a terminal emulator on your computer that interpreted bytes being received by your modem and would draw your text-based UI – special codes allowed the cursor to be repositioned, the text color to be changed, and even basic graphic characters to be displayed. As with any restricted medium, people found ways to express themselves with this limited palette and the results were often quite amazing.
Then, the web came along and, almost overnight, wiped out dial-up bulletin boards. Why call a single machine shared by a few hundred users when you could browse the world? Happily, the communities didn’t die, they just moved onto web-based forums and the world moved on.
Serial: not dead yet!
So what happened to serial ports? Well, they never really went away. Though desktop and laptop computers lost their serial ports – replaced with USB – they still remain on many other devices, from servers to phone exchanges, UPSes, industrial equipment and embedded devices. The reason they never died is that you often need a way to configure or diagnose a device, and serial is simple, cheap and flexible enough to do the job; you can even have pretty menus if you use control codes!
The downside – or advantage, depending on your point of view – is that you need to be within a few feet of the port to plug in. Whilst that’s great for security (physical access to a device often opens up the attack surface) it’s often a real pain if you’re trying to diagnose a sporadic issue, or need to be able to reboot a server from its console port when you inadvertently screwed something up during a remote software install.
For those times, wouldn’t it be great to have a serial port you could connect to over the internet? Such things – TCP/IP to serial gateways, terminal servers, etc – have existed for a long time, but they’re often severely lacking in security as they date from back when the internet wasn’t quite the 24/7 hackers paradise it is now. A quick look at Shodan.io uncovers a disturbing number of pieces of presumably critical infrastructure which someone has wired up to one of these gateways – and because these serial connections were intended for use by an engineer in the same room as the device, they’re often completely unprotected. Not only that, in most cases someone has actually opened up a hole in a firewall or NAT to allow remote access to the device – another action fraught with risk.
So, how could this be done better? Well, Electric Imp devices have always made secure outbound internet connections to the Electric Imp service (or, for enterprise customers, their own copy of the imp service) – that means no firewall holes are needed. Also, the link is encrypted and protected with TLS1.2 & forward secrecy, meaning the connection is about as secure as current standards allow… but that doesn’t get us a serial port, does it?
Actually, it does. Every imp has several UART peripherals – 3v serial, essentially – and data to and from them can be transparently piped to every imp’s unique cloud virtual machine. This same cloud virtual machine – we call them “agents” – can also serve up a web page and an API, which gives us all the tools we need to build an in-browser serial terminal with – effectively – an infinitely long virtual cable to plug into anything we need to wrangle remotely. The imps that have a USB host – imp005 and the cellular impC001 – could also do this with a USB-serial adaptor, though that’s not part of the example code.
Building a secure web-based terminal
The Electric Imp platform allows us to exchange data between a webpage and a serial port – but how do we display this data? Luckily, someone has built some JavaScript to emulate an ANSI/VT100 terminal – and it’s called Xterm.js. If we feed bytes from the imp’s serial port to this JS component, it’ll render just as if we were sitting on the floor in the machine room running a terminal emulator program connected to a serial port. Xterm.js also captures keyboard input and we can then send this from the browser, to the agent and onwards to the imp and its UART.
Latency
When using a text-based UI, response time is important – it’s annoying to type something and have a long lag between pressing the key and seeing it appear on the screen. In an ideal world, agents would offer “websockets” – a transparent, persistent pipe between the browser and the agent, perfect for this application – but those are still a little way off in our roadmap and so we’ll have to make do with HTTPS input and output for now.
Fortunately, this isn’t as slow as you might think because HTTP/1.1 session reuse between the browser and the agent means that even though we still have to bear the overhead of HTTP headers and so on for every transaction, the underlying TLS connection is persistent; in order to provide a near-instant path from the agent back to the browser, we can also make use of an old (in web terms!) technique called “long polling”.
When long polling, the browser issues a request to the agent, but the agent doesn’t reply until it has something to send (like new data from the serial port). Requests can’t sit there forever though, so every 60 seconds pending requests are closed and the browser will issue a fresh one; this is a really effective way to provide low latency notifications, and one used by hundreds of thousands of commercial devices used on the Electric Imp cloud.
The round trip is pretty tortuous, though – when a key is pressed, it’s sent via an HTTPS POST to the agent, which sends it to the imp with device.send(). Once the imp receives it, the byte is written to the UART and clocked out (which, at 9600bps, takes a little over a millisecond). The remote system then echos the character (again, another millisecond), which is received by the imp & sent back to the agent with agent.send(), then the agent will send the new data out to the listening HTTP GET session. As the imp platform is low latency, we still get a decently responsive session – far preferable to sitting on a cold floor tethered to a serial port.
How about multiple sessions? One of the fun things here is that we can make the agent be responsive to several concurrent browser sessions, sending new data out to each one as it arrives – this means you can effectively share a terminal, allowing a colleague to watch you work and jump in if necessary. To make this work, the agent keeps up to 100kB of data that has been received from the device and, to keep everything in sync, each browser tells the agent what received byte number it has dealt with. When you open a new browser window, the past data is replayed and so everything – including a decent amount of scrollback in the terminal – is usable.
Security
There are a couple of aspects to this:
- Imp to cloud security: as noted before, this is a TLS1.2 outbound connection from the device to the imp server. Both ends use certificates to validate each other, and forward secrecy (an ephemeral link key) is also used for this connection. Every imp, developer or production, connects like this – and we take on the responsibility of maintaining the security stack of every device in the field, leaving you to spend your time on the application side of IoT.
- Agent endpoint security: in this example we’ve configured Rocky, the HTTP server helper library, to require HTTP basic auth. This ensures that every request has a header that contains the required username & password. Though it’s very unlikely that someone could find your agent by enumerating the very large agent namespace, this extra level of security will help prevent someone shoulder-surfing your agent’s URL and accessing your serial device. Ensuring that this connection can only be made over HTTPS prevents the username/password from being easily snooped too.
As ever, security needs to be appropriate for the application and threat model. Contact us if you are looking for guidance on securing imp applications.
Putting it all together
I’ve published the example code to our public GitHub repository; you can find it at https://github.com/electricimp/RemoteTerminal. To use it, create a new product & device group, then cut & paste agent.nut into the agent side of the IDE, and device.nut into the device side – then assign a device.
You’ll need to alter the device side code to suit your needs – selecting the appropriate serial port and baud rate – and you’ll also want to change the username and password at the top of the agent code; the format is “username:password”.
Pull requests to add features like configurable baudrate & spooling output to a file gratefully received!
Example application
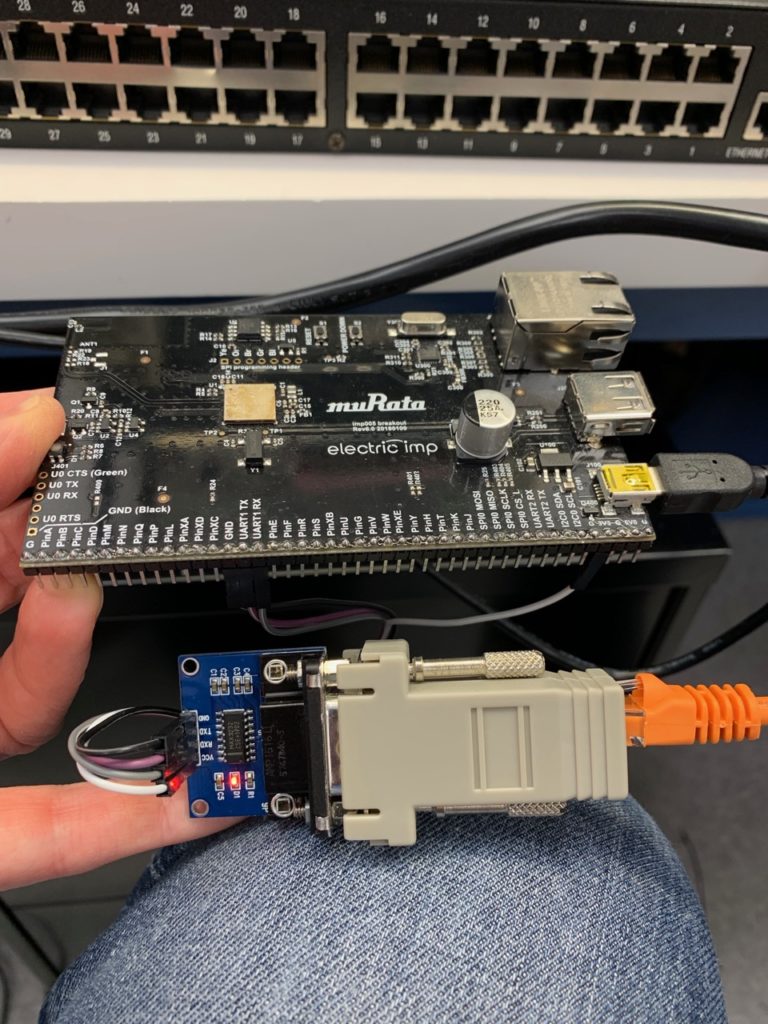
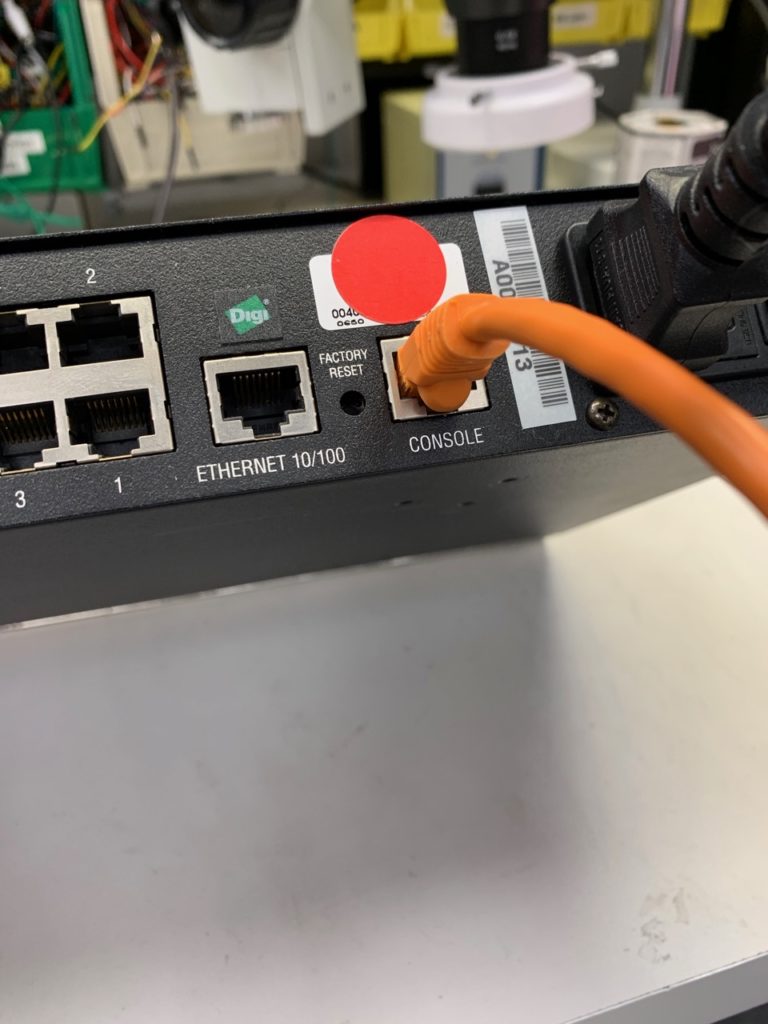
Here, we’ve used an imp005 breakout board (though any imp breakout will work), a TTL to RS232 adaptor, a DB9 to RJ45 modular jack adaptor, and a patch cable to connect an imp to a Digi terminal server’s console port.
Click here to get to the live demo – the username is “username” and the password is, unsurprisingly “password”. Given that the terminal server the imp is connected to was picked up at DEFCON a couple of years back, it’s quite apt that we’ve just exposed it to the internet (the box itself is not connected to any network!).

